UnityでOpenCV系の検索するとだいたい有料アセットの「OpenCV for Unity」が引っかかる。
今回は無料アセットのOpenCV Plus Unityを使って顔を認識させて、顔の位置にオブジェクトを配置して追従させる。
Unity 2017.4
手順
アセットをインポート
unsafeエラーが出るのでBuild Settings>Player Settings>Other Settings>Allow ‘unsafe’ Codeにチェックをつける。
Assets>OpenCV+Unity>Demo>FaceDetectorSceneシーンを開く
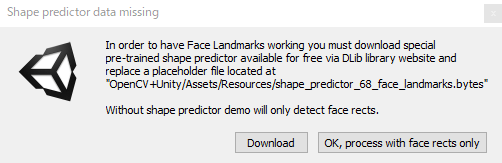
初めて実行するとこのメッセージが出てくるけど×で閉じる。
目とか輪郭を追加情報DLしたら表示できるだけなので今回はパス。
邪魔なのでスクリプトから消す
FaceDetectorScene.csから以下をコメント化
#if UNITY_EDITOR
				// query user to download the proper shape predictor
				if (UnityEditor.EditorUtility.DisplayDialog("Shape predictor data missing", errorMessage, "Download", "OK, process with face rects only"))
					Application.OpenURL("http://dlib.net/files/shape_predictor_68_face_landmarks.dat.bz2");
#else
             UnityEngine.Debug.Log(errorMessage);
#endif
WEBカメラが問題なければ普通にひょじされて顔の周りに赤枠がつく。

エラーが出る場合は
FaceRigとかunityCaputureとかwindowsMRのUSBがWEBカメラとして認識したり
カメラ関係が問題あるのでなんとかする。
あるあるやなぁ。うちでも困ってた。デバイス名に2バイト文字入っててunityでデバイス名取得できないとかじゃなかったっけ
— 光輝@XIRC (@koukiwf) August 21, 2019
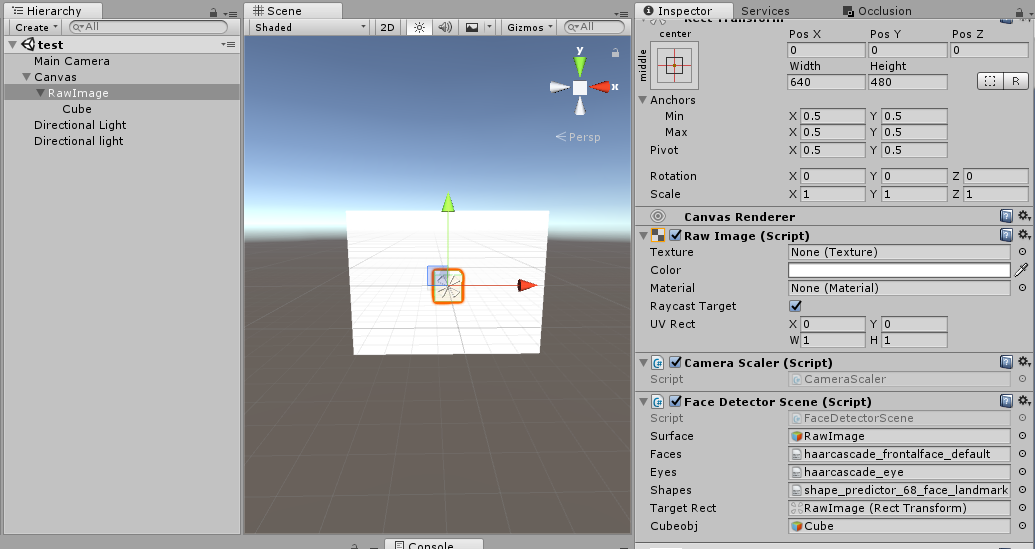
シーン内のCanvas>RawImageのFaceDetectorSceneスクリプトが赤枠つけてる処理なので調べる
ProcessTexture内のprocessor.MarkDetectedが赤枠を付けた情報を返しているので中身を見る
必要なのはココだけ(余計なモノ省いた状態)
        public void MarkDetected()
        {
            foreach (DetectedFace face in Faces)
            {
                //顔の長方形
                // Cv2.Rectangle(画像,左上と右下の角の座標,線)
                Cv2.Rectangle((InputOutputArray)Image, face.Region, Scalar.FromRgb(255, 0, 0), 2);

            }
        }
この中のface.Regionが顔の位置を持っているので、顔の位置情報とかを返すように修正する
 public void MarkDetected(ref int x,ref int y,ref int width,ref int height)
        {
            foreach (DetectedFace face in Faces)
            {
                //顔の長方形
                // Cv2.Rectangle(画像,左上と右下の角の座標,線)
                Cv2.Rectangle((InputOutputArray)Image, face.Region, Scalar.FromRgb(255, 0, 0), 2);

                x = face.Region.Center.X;//中心点のX
                y = face.Region.Center.Y;//中心点のY
                width = face.Region.Width;
                height = face.Region.Height;

            }
        }
あとはもらった情報をワールド座標に変換するためなんか色々調べる。ここが分かりやすかった。↓
FaceDetectorSceneスクリプトを修正する。
色々理解できてなくて絶対に全然違うところあるので誰か教えて欲しい・・・
public class FaceDetectorScene : WebCamera
	{
	public TextAsset faces;
	public TextAsset eyes;
	public TextAsset shapes;

	private FaceProcessorLive<WebCamTexture> processor;

        //良く分からんが追加
        [SerializeField] private RectTransform targetRect;//WEBカメラのテクスチャを貼っているターゲットを指定
        private Canvas _canvas;
        public Canvas Canvas { get { return this._canvas ? this._canvas : this._canvas = targetRect.GetComponent<Graphic> ().canvas; } }

        public GameObject cubeobj;//追従させるCubeオブジェクト

        Vector3 worldPos = Vector3.zero;//ワールド座標

        //OpenCVから帰ってきた情報を格納するヤツ
        private int testX;
        private int testY;
        private int testW;
        private int testH;

        //追加ここまで

     //途中省略~


     /// <summary>
	/// Per-frame video capture processor フレームごとのビデオキャプチャプロセッサ
	/// </summary>
	protected override bool ProcessTexture(WebCamTexture input, ref Texture2D output)//テクスチャを返す
	{
	// detect everything we're interested in  興味のあるすべてを検出する
	processor.ProcessTexture(input, TextureParameters);

	  // mark detected objects 検出されたオブジェクトにマークを付ける
	  processor.MarkDetected(ref testX,ref testY,ref testW,ref testH);

           Vector2 testvc2;
           testvc2.x=testX;
           testvc2.y=testY;

           GameObject mainCamObj = Camera.main.gameObject;//メインカメラ取得

            //スクリーン座標→ワールド座標に変換
            //RectTransformUtility.ScreenPointToWorldPointInRectangle:変換
            RectTransformUtility.ScreenPointToWorldPointInRectangle (targetRect, testvc2, Canvas.worldCamera, out worldPos);

            if(testvc2 != Vector2.zero){//顔認識した時だけオブジェクトの位置を更新

               worldPos.z=0;
               worldPos.y=-worldPos.y;
               cubeobj.transform.position =  worldPos;
               Debug.Log("x:"+worldPos.x+" "+"y:" + worldPos.y +" " +"z:"+worldPos.z);
            }

	    // processor.Image now holds data we'd like to visualize
            //processor.Imageは、視覚化するデータを保持するようになりました
	    output = Unity.MatToTexture(processor.Image, output);   // if output is valid texture it's buffer will be re-used, otherwise it will be re-created
            //出力が有効なテクスチャである場合、そのバッファは再利用され、そうでない場合は再作成されます

	   return true;
	}
CanvasオブジェクトのRenderModeはWorldSpaceにする。
アタッチする情報とかはとりあえず以下を参照
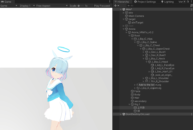
なんか色々してたらwebカメラで顔認識してオブジェクトの追従っぽい事できるようになった!
位置がズレてる原因は今から調べる。 pic.twitter.com/sNXMpCjtNz
— シロフード (@sirohood_exp) October 6, 2019
赤枠の中心点からズレるのはCanvasカメラとかScreenPointToWorldPointInRectangleあたりが何か間違ってるんだろうけど
わからん・・・
とりあえずいったん動くところまで。
このページちゃんとした処理が分かるまで検索エンジンに引っかからないようにしておこう・・・。
※コメントは承認後に表示されます。
コメントを公開されたくない場合、名前の後に「:非公開」とつけてください。